|
Setting Up and Configuring Windows XP
Fax
The fax service isn't
automatically installed in Windows XP. To install the fax
component:
1. Open
Control Panel, and click Add or
Remove Programs.
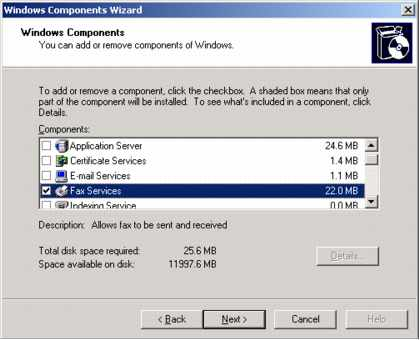
2. Click
Add/Remove Windows
Components. Select the
Fax Services check box, and then click Next. The
Windows Component Wizard
takes care of the rest.
Note: If you don't
have a modem already installed, take care of that now. Make sure
the modem is connected to a phone line and the phone line is
connected to a working jack. (You'd be surprised how often folks
overlook these details.)
3. Check that the
Microsoft Fax service (`Fax') is started and set to automatic. You
can do this from Control Panel->Administrative
Tools->Services applet.
4. Check that the
Microsoft Fax printer driver is installed from `printers and
faxes'
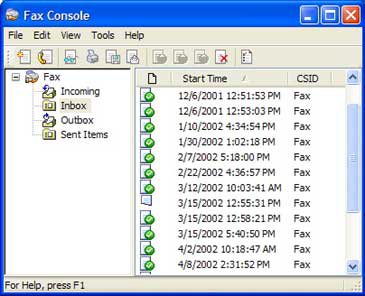
After the fax
component is installed, the next step is configuring it. You
configure the Fax service in the Fax Console, the
center for faxing tasks. To configure the Fax Console:
1. Click
Start,
point to All
Programs, point to
Accessories, point to Communications,
point to Fax, and then click Fax
Console.
2. On the
Tools menu in Fax Console, click Configure Fax, which
starts the Fax Configuration
Wizard. Click Next to start
configuring your fax information.
3. On the
Sender Information page, include your name or your business name and your
fax number. Everything else on the page is optional.
4. On the
Select Device for Sending or Receiving
Faxes page, your modem will be
selected, unless you have more than one, in which case, select the
right one. Specify send and receive options, and whether you'll
manually answer incoming faxes or answer automatically when
received.
5. On the
Transmitting Subscriber Identification
(TSID) and Called Subscriber Identification (CSID)
pages, enter your business name and fax
number. These fields really matter when you're running special fax
routing software. Most software of this kind depends on TSIDs to
determine where to direct an incoming fax.
6. On the
Routing Options page, specify how incoming faxes will be handled. All
faxes are stored automatically in the Fax Console, but you can also
print a copy or store a copy in a local folder or on your
network.
When you want to
change or verify any of these settings, simply run the Fax
Configuration Wizard again. To open the wizard, on the
Tools menu of the Fax
Console, click Configure Fax.
Sending Faxes from Your
Computer
You can fax a
document that's stored on your computer by sending to your fax
printer. In this section, I'll explain how to fax a document from
your computer. If you can print a document, you can fax it.
To fax a document
stored on your computer:
1. On the
File menu of the document, click Print.
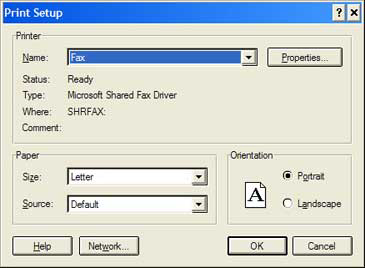
2. In the
Print dialog box, in the Printer name box,
click Fax to open the Send Fax
Wizard.
3. To supply the
recipient's fax number, click Address Book, and
select one or more recipients just as if you were sending them an
e-mail message.
4. If you've already
set up Dialing Rules, skip ahead. If you haven't, click
Dialing Rules. If you need to dial an extra digit to get an outside
line, or use a special carrier code, or dial an area code even for
local numbers, add those settings here, and then click
OK to
return to the fax sending.
Very
Important: Telephone numbers must be
in the canonical form
in which a U.S. number would appear as +1
(626) 555-1212. If you use even a slightly
different form such as (626) 555-1212 or
1-626-555-1212, the dialing rules won't be applied and the fax
transmission will fail.
5. Select a cover
page. Choose from the list or specify no cover page at all.
6. Specify when the
fax should be sent as well as the fax's priority. Priority only
matters if you're stacking up a number of faxes to be sent at a
particular time. In that case, the order of sending will be
determined by the priority you set.
7. Finally, you're
presented with a screen recapping the details of the fax and
offering a chance to preview it. If the fax is a multi-page one,
you'll be able to preview only the first page.
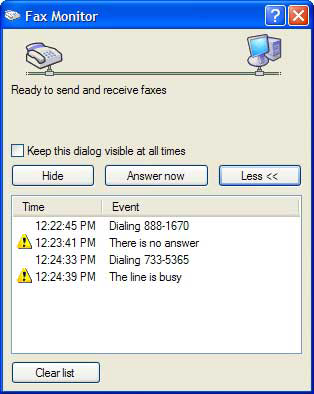
If you're sending the
fax right away, the Fax Monitor, shown below, will start when the
dialing does.
|

